Showing posts with label tutorial. Show all posts

Saturday, February 5, 2011

Lip Balm Valentine Holder

Worked on this little tutorial today and wanted to share with you all!

You'll need a small piece of cardstock, some patterned paper, 2 6-inch pieces of ribbon and other embellishments as desired.


Step 1: Cut a piece of cardstock 3 1/2 X 5 3/4 inches
Score at 2 1/2 inces and 3 1/4 inches. If you don't have a Scor-Pal, you can use your cutter and bone folder/other tool as shown.


Step 2: This is what it should look like


Step 3: Measure down 1 1/2 inches from the top, and also 1 1/2 inches from the bottom. Using a blade, cut two 1 1/2 inch slits, making sure the cuts start at the right edge of the fold line and extend to the left. Hope this makes sense!


Step 4: Fold this piece forward. You'll notice that the slits run totally through the back fold and extends about another 3/4 inch.


Step 5: Measure up from the bottom 1/2 inch. Cut 2 more slits here, for the chapstick to rest on. This will be a 1-inch cut.


Step 6: This is what it will look like when closed.


Step 7: Adhere one strip of ribbon on the center of the back cardstock.


Step 8: Spread glue (or other adhesive) on the outside of the cardstock, front and back. Don't add it on the folded strips. Also, adhere the second piece of ribbon to the front (I didn't get a picture of this)


Step 9: Cut a piece of patterned paper 3 1/4 X 5 1/2 inches. Score at 2 1/4 and 3 inches (as you did with the cardstock).
Adhere to cardstock to cover the holes on the back.


Step 10: Decorate the inside , if desired.


Step 11: Embellish the front.


Wednesday, December 1, 2010

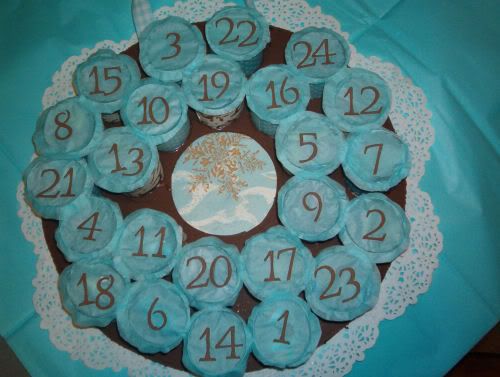
Advent calendar

I am re-posting a project I did in 2008. It's an advent wreath. I had a friend ask about it today, so I thought posting it here would help her see how it's done.

It's not that difficult to make, and like all advent calendars -- lots of fun for kiddies to open each day :-)

Ok, you'll need some paper towel rolls, a sheet of 12x12 cardboard, paint (if desired), tissue paper, strong glue, patterned paper and some number stickers.


Take a 12x12 circle of cardboard. I painted mine brown. I also cut out the center of the big circle, but filled it in again with some pp.

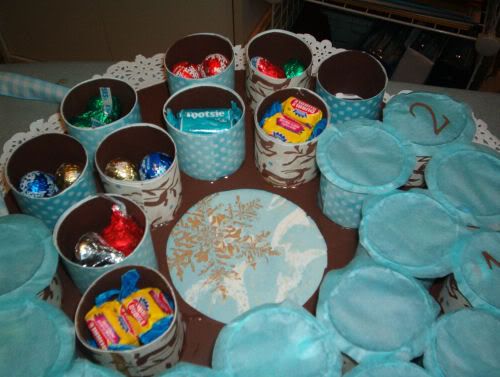
The "holders" are paper towel rolls cut into pieces. You can cut them 1-inch high, but mine were 1 1/2 because I had 4 treats to fit in each.

We painted the inside of the rolls and cut 1x6 inch strips for the outside. Glued them down with some tacky glue and let them dry well before I added treats.


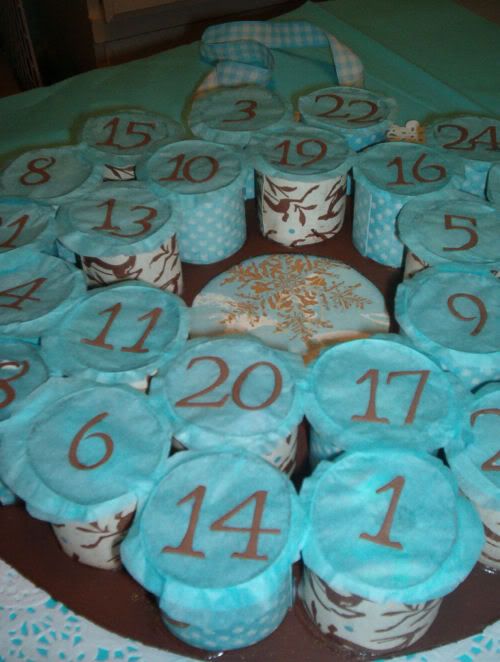
The tops are made from tissue paper. I just cut some freehand circles, added some tacky glue around the edge of the rolls and pressed the tissue paper over the top. I actually had to add more glue and another layer of tissue paper as I could see through them.


I added numbers using my Cuttlebug dies and punched 2 holes to add some ribbon for hanging. Wait until the glue sets before hanging.


Tuesday, January 20, 2009

I posted a tutorial

over at Sisterhood of Scrap. Can you believe this is the first time I made a "shaker box"??

Take a look :-)

Tuesday, November 25, 2008

Tutorials posted on...

Christmas Cards All Year 'Round blog. Check it out :-)

Origami Christmas Tree
Christmas Planner